To start sharpening planes and chisels, we need to collect a few supplies. For my system, all of these parts are required except the permanent markers.
1" Belt Sander
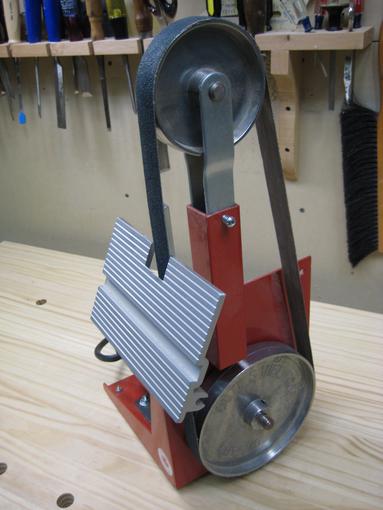
I use a 1" belt sander to establish the primary bevel. My belt sander is made by Viel Tools. I like this machine because it comes with a tilting table that allows me to grind a blade to 25° (see review). I use three belt grits, 40, 80, and 120.
You could also get a 1" belt sander from Delta, Grizzly, Harbor Freight, or Kalamazoo, but none of those sanders allow you to set the table to 25°, so you will have to rig up your own table. Brent Beach has information on his website on how to modify the Delta belt sander to allow grinding to 25°. If you don’t get the Viel sander and have to modify one, I’d probably just get the Harbor Freight sander since it is so inexpensive.
Sandpaper
For honing abrasives, I use 3M Micro Abrasive Film with a PSA (pressure sensitive adhesive) backing. I use grits 40 micron, 15 micron, 5 micron, and 0.5 micron. 3M does not make the 0.5 micron with a PSA backing any more, so I would use 0.3 micron or 1 micron instead. Buying the abrasives with PSA backing is worth the extra money. You can get a better, flatter adhesion to the glass than with spray adhesive. I have tried both.
These abrasives cut very fast. They work much better than anything I bought at the auto supply stores. The courser the abrasive, the faster it wears. The 0.5 micron lasts a very long time and the 40 micron wears out pretty quickly.
Are you worried about how much the abrasives will cost over time? Don’t be. Buy a sample pack of two sheets of each and see how long that will last. If you run out, then you can decide if you think it is worth it. You’ll get many sharpenings out of that sample pack. When I was trying to decide which sharpening method to use, I considered buying Shapton waterstones because “everybody” said they are “the best.” You can buy a lot of sandpaper for your down payment on Shapton stones. Just give the sandpaper a shot. You’ll like it.
Glass
Use 1/4" or thicker glass. Note that what stores call 1/4" glass is really about 5mm thick. When you are calling around trying to find glass, don’t say you are looking for 5mm glass for sharpening. That will just confuse the crazies out of the glass stores. Say you want 1/4" table top glass. The glass does not need to be tempered.
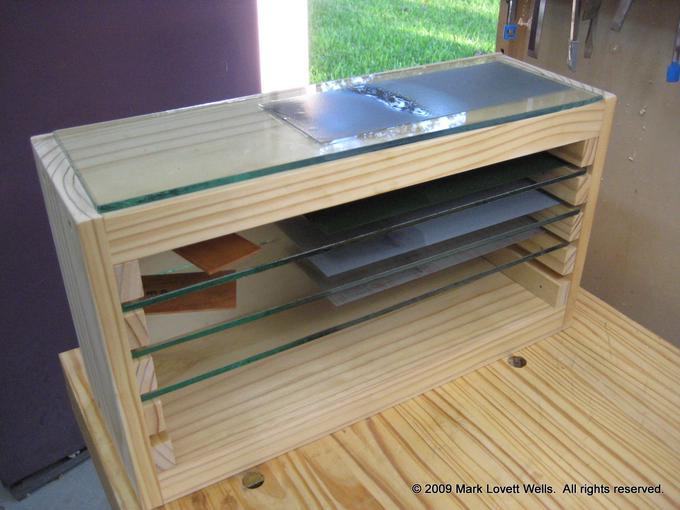
I adhere each abrasive to a separate piece of glass that is 6" x 18". I cut the abrasive sheet in half so I end up with a piece of abrasive that is 5.5" x 8.5". The glass is stored in the stand pictured here. When I need an abrasive, I pull it out from below and put it on top. The top has a lip on 3 sides which keeps the glass in place. This stand makes the glass easily accessible, protected from dust, and takes up very little space. Make sure you leave one side without a lip because when you sharpen chisels, you will need that side to flatten the back of the chisel.
The best place to find glass is locally. Option one is to go to a glass store and ask them to cut the glass for you. Tell them you don’t care what the edge looks like. Make sure and call around because you will find wildly varying prices. Option two is to find some free or inexpensive glass on craigslist and cut it yourself. I had success cutting glass with an inexpensive Fletcher glass cutter and a 5 minute lesson from the glass store. If you cut the glass yourself, remove the sharp edges using 150 grit sandpaper. I used my belt sander, but I won’t do that again. Do it by hand.
Brent Beach adheres his glass to a backing board to protect the edges. I don’t do that and I haven’t had any problems.
Baby Oil and Paper Towels
The abrasives work better when you put baby oil on them to help carry away the filings. Baby oil is just mineral oil with a fragrance added. I use it because it is cheaper than plain mineral oil.
I use paper “shop towels” to clean up the baby oil. I keep meaning to experiment with a regular cotton towel to cut down on the paper towel waste.
Honing Jig
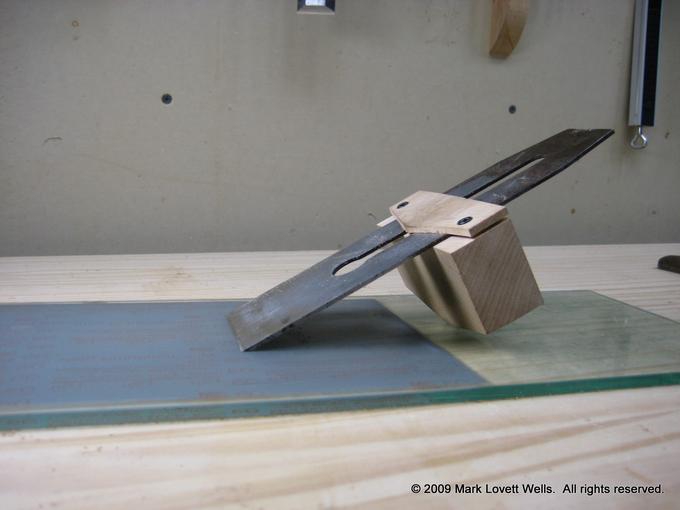
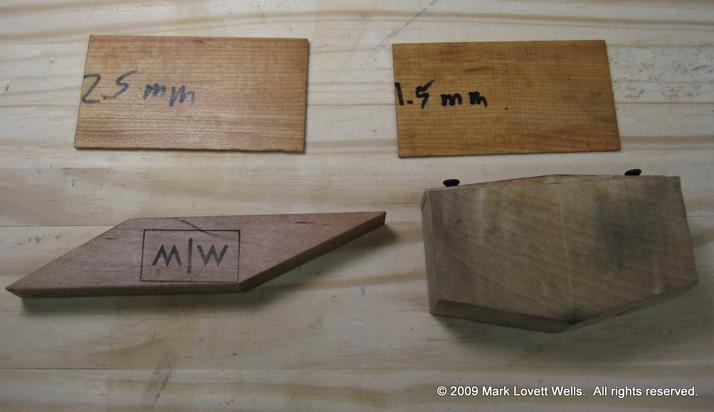
I use a homemade honing jig. This jig works very well. The jig system consists of four pieces:
- The honing jig itself
- A thin piece of wood, called a “slip” which is about 1.5mm thick.
- A second slip which is about 2.5mm thick.
- A wooden block to set the angle. The entire system costs about 10 cents in materials.
Read more about this jig.
Sheet of Copier Paper
I use paper to test an edge to see if it is sharp. Just about any paper will do, but for consistency, it helps to use the same kind of paper over time. I usually use left over print outs of my project designs.
Try Square
You will need some type of square, either a small engineer’s square or a combination square. This is used to check that the edge is perpendicular to the side of the blade. The widest blade you are likely to sharpen is a plane blade for a Stanley #8, which is 2 5/8" wide. Make sure the blade of the square is long enough to check your widest blade.
Permanent Markers (Optional)
Permanent markers are optional, but useful. I use two, one thick and one very fine in my sharpening station. The thick marker I sometimes use to color the bevel. As I grind, the color is removed and I can clearly see where the belt sander is grinding. I have not had good luck using the same trick while honing. I think the mineral oil dissolves the marker ink.
The thin marker I use in combination with the square to draw a line on the back of the blade so I have a reference line to grind to.
Let’s get started!
