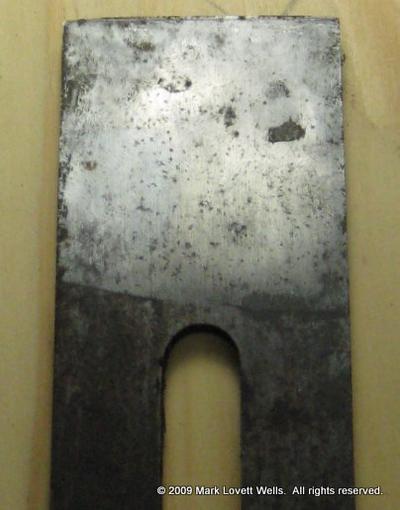
The first step in preparing the edge is to grind it square. This photograph is the back of the blade on the previous page. The cutting edge is at the top of the photograph. See how the edge has a pronounced and uneven camber? I want to remove that camber so the edge is square to the side.
Using a small square and a fine point permanent marker, I drew a line across the back of the blade, very close to the edge, square to one side.
Like many old (and new) plane irons, the sides of the this plane blade are not parallel. After I drew the line, I checked for square against the other side and discovered that my line was not square with respect to the opposite side. You can square the edge to one side or split the difference. Either method works.
To grind the edge, I will use a Viel Tools S5 Belt Grinder.
Thanks to Brent Beach for pushing me down the belt sander slope.
Safety
Grinding produces hot sparks.
The sparks are bits of metal that can get in your eye. Even Roy Underhill wears safety glasses when grinding, so you should, too.
Those sparks can also start a fire. Keep your grinder away from saw dust or 911 might be in your future.
Square the blade
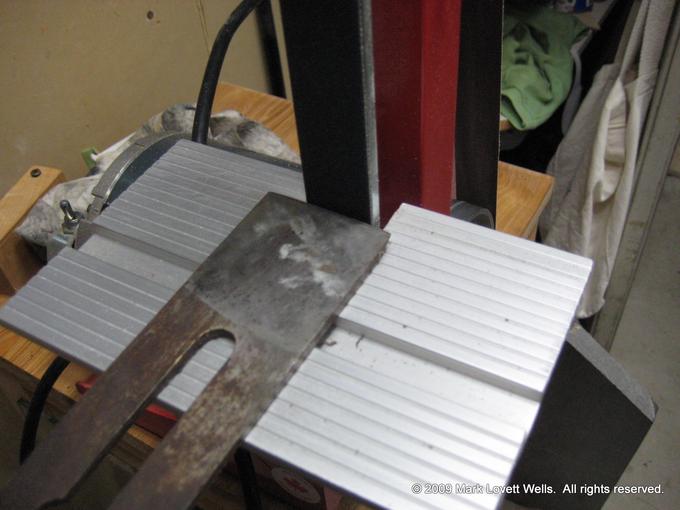
I put a 120 grit blue zironia belt on the belt sander, set the belt sander table to 90°, and laid the iron on the table with the back up (bevel down).
The goal of this step is to make the edge square to the blade.
I moved the blade back and forth using whatever hand position felt natural. Sometimes it helps to use mainly my thumbs.
I tried really hard not to grind too much. This grinding produces a flat at the cutting edge, which is time consuming to remove at the next stage.
With the blade square, it’s time to work on the primary bevel.
