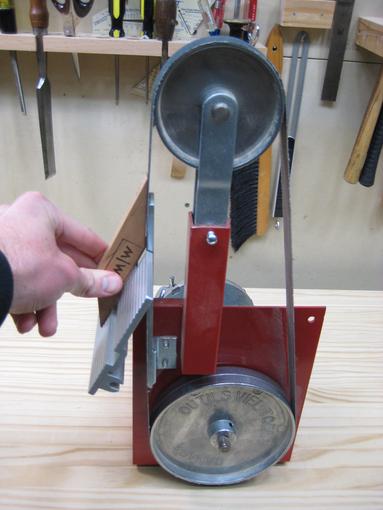
This tutorial explains how to grind a plane blade using a Viel Tools S5 Belt Grinder.
Thanks to Brent Beach for pushing me down the belt sander slope.
Grinding is key to sharpening. In fact, it may be the biggest hinderance to sharpening. I’ve tried course sandpaper on glass, a course silicon carbide stone, and a hand crank grinder. I found the belt sander by far the best option.
Safety
Grinding produces hot sparks. The sparks are bits of metal that can get in your eye and can start a fire. Even Roy Underhill wears safety glasses when grinding, so you should, too. Also, keep your grinder away from saw dust, or you are likely to start a fire.
Technique
Before we get to specifics, let’s talk about the general technique.
To guide the blade, Brent Beach taught me to squeeze the blade against the table using my thumb on top and my fingers below. That seems to work. I wrap my fingers over the top of the table and move the blade with my thumbs. Generally I just go one direction, but do whatever feels most natural.
Keep your thumbs near the edge that is getting ground. This offers better control and allows you to feel when the metal is getting hot. If the blade gets hot, you can quickly cool it down by pressing the back of the iron to a large cast iron surface like a table saw, bandsaw, or jointer. The cast iron will serve as a heat sink and quickly absorb the heat from the blade.
I use three grits of zirconia (blue) abrasive, 40, 80, and 120. The courser the abrasive, the cooler and quicker it grinds, but the rougher surface it leaves. If you have a significant amount of material to remove, go ahead and start with 40. As you get close, move to 80 or 120.
Your grinding does not have to be perfect. We will remove imperfections in grinding when we get to the honing stage.
Square the blade
Use a try square to test whether or not the edge is square to the side of the blade. Test both sides because very often the sides of the blade are not parallel. In that case, I just pick a side and try to always remember to use that side for the life of the blade.
If the blade is already square and has no significant damage, then move on to defining the bevel below.
If the blade is not square or has significant nicks, then use a fine point permanent marker and the try square to draw a line on the back of the the blade, defining the line you want to grind to. Set the table of the sander perpendicular to the belt and grind the edge square. The back of the iron should be facing up. This stage will go very quickly, so don’t get carried away. Removing a lot of metal at this stage will significantly slow down the next stage.
On old blades, sometimes the corner is broken off. I would not bother grinding that away. It will slowly go away over time.
Define the bevel

With the edge squared, move to the bevel. Defining the bevel requires removing a lot more metal than squaring the edge.
Set the table of the belt sander to 25°. I small block of wood cut to 25° on the bandsaw works great for this. See the picture at the right.
As described above, use your thumbs to guide the blade back and forth, define the primary bevel.
Frequently pick up the blade and observe your progress. If you can’t tell where you are grinding, use a permanent marker to darken the entire bevel. Then take one pass and see what gets removed.
If your progress check shows that you are grinding at the edge, then stop! That means the bevel is already below 25°. There is no reason to keep grinding.
The more likely scenario is that the bevel will be steeper than 25°. In that case, you will see grinding marks on the heel of the bevel. Keep grinding until you get to the edge, but frequently check your progress. It’s also a good idea to check the edge with a square every once in a while. Remember that the sides of the plane may not be parallel, so use the square against the same side each time. You will find that you are grinding more in one area than another. Focus on the areas where more metal needs to be removed to get the edge reasonably straight and square. One of the big advantages of a narrow (1") belt sander is that you can easily focus on areas that need more grinding.

When working on a blade that’s new to me, I usually grind all the way to the edge. Especially if I had to square the blade above, I want to make sure you get an edge with no flat left. I look for the flat by reflecting light on the edge. Be aware that the last 10% of the grinding seems to take 90% of the time. As the bevel gets more defined, you have to remove more and more metal. Take your time.
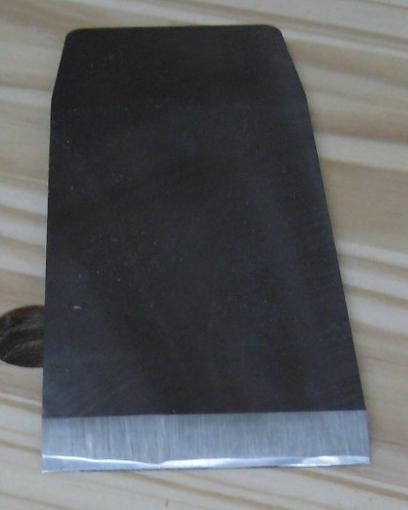
Remember that this is a course operation. Your bevel does not have to look good, it just needs to be functional. Click on the picture to the right and you will see what I mean. I ground this iron. The shiny section at the edge was honed perfectly flat. The line is wavy because my grinding was imperfect. Don’t worry about it. You can correct grinding problems at the honing stage.
